Category Archives: Lifestyle

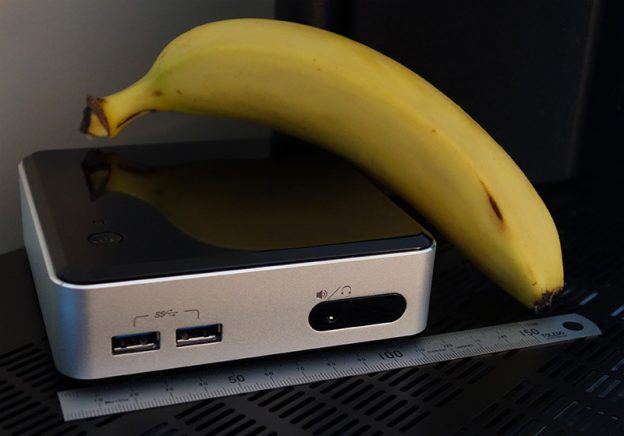
NUC Banana

Adventures with XBMC (Kodi): Intel NUC

In my previous post, I briefly explained the process that I went through to use XBMC (now Kodi) on an old computer.

My old computer didn’t actually die, but I struggled with it for well over a year. It would fail, I’d jiggle the components and it would live on. The Logitech Z5500 control pod is what failed after 7 years of enjoyment. Ideally you want an A/V Receiver that supports HDMI pass-through. I replaced the old home theatre with an affordable Yamaha package, sporting an RX-V375 Receiver, NS-PB120 Speakers, and a YST-SW216 10″ Subwoofer.

The NUC that I chose is the D54250WYK. The most powerful model at the time with an i5 processor. Opening the box you are welcomed with the famous Intel tune, which is a cute gimmick. I’ve dropped in 8GB of Kingston RAM, Intel Wireless AC card and an Intel 30GB mSATA SSD. The last items required are a Cloverleaf (C5) power cable and a Mini-HDMI to HDMI 1.4a cable. These Intel NUC’s are smaller than you think, its an incredible device. It even has an on-board IR sensor.

Make it Work

Of course, the Operating System I’ll be using is OpenELEC. You can download the latest release here. I’ll run you through my forum findings as best I can.

With the BIOS version available at the time of this post. The device would restart instantly when it tried to suspend. I managed to get it working by disabling all settings in the Power options. I then set ‘Wake on LAN from S4/S5’ to ‘Power On – Normal Boot’, and enabled the ‘Deep S4/S5’ setting. With this configuration I am able to send the device into a low power state. I am then able to wake it using the IR sensor and my Harmony 700 Remote. Intel actually responded right after I posted in the long running thread about the issue. There is a beta BIOS that appears to address the bug. I will update when it goes stable.

Once you have installed OpenELEC, you might notice that your remote does not work. The IR driver is not enabled by default. You’ll want to edit the autostart.sh file from another computer on your network using SSH. What is SSH?

After figuring out SSH, enter the following command to edit the file.

nano /storage/.config/autostart.sh

Then add the following lines to the file to enable the driver.

#!/bin/sh

modprobe -r nuvoton-cir
echo "auto" > "/sys/bus/acpi/devices/NTN0530:00/physical_node/resources"
modprobe nuvoton-cir

If you find that your colours are washed out and you have an RGB ‘Full Range’ display like mine, add this line while you are there.

xrandr --output HDMI1 --set "Broadcast RGB" "Full"

Ctrl+X to Save and Exit. Then run this final command for good measure.

chmod 755 /storage/.config/autostart.sh

Now reboot your NUC and check to see if the changes have worked. I am assuming you already have a Windows Media Center SE profile installed on your Harmony Remote, or equivalent device. The remote should now control Kodi, and colours should be deeper.

That’s about all you need to do right now to get the Intel NUC running with Kodi. The rest comes down to personal preference. I might write some posts about more customisations I like to make in the near future.

RAWR-Designs.com Logo

RAWR-Designs

Some people may recognise me as the rejetto forum admin TSG, or from the official HFS facebook page that I created.

8 years ago I was introduced to HTTP File Server by flynsarmy. HFS is a simple open source server application for Windows. I found the application to be a useful tool for practicing web design and programming. HFS still finds a place on my hard drive to this day. It is one of the easiest ways to share and access your files remotely.

After submitting a couple of templates, I began working with Giant Eagle. Richard was a fellow template builder on the HFS forum. Together we formed RAWR-Designs. Our goal was to create better quality applications and templates for HFS.

Projects

  • Thunderchicken of Glory template
  • Terayon template
  • RAWR-Template
  • RAWR-Player
  • Live 3 template
  • and our very own Thumbnail and Preview Generator.

We purchased a domain and hosted our own website to help support a growing forum community. 3 years have passed since active development, but there is still demand for our templates on the rejetto forum. Giant Eagle missed a renewal, the host has taken ownership of the domain. I’ve decided to add a mirror of the files on my personal website.

Hopefully people continue to enjoy HFS, and the templates we create for it.

XBMC Media Center Logo

Adventures with XBMC

My Smart TV and PS3 both struggle to support certain codecs. They both fail as a complete digital media player. I decided to have a play with XBMC to create a networked media device that would play anything I throw at it. The main storage source is currently a Windows 7 PC on a gigabit network.

A basic HTPC does not require a very powerful computer. I am going to attempt this with some old computer parts that I had laying around. The new Intel NUC is a popular choice. Some people like the Raspberry Pi or Android based devices.

TV/Monitor
Samsung Series 6 LED/LCD 40″ Full-HD TV
Audio Equipment
Logitech Z5500 (via COAX)
Case + Power Supply
ATX/mATX case with Antec EarthWatts 380w
Motherboard
GA-945GCM-S2L
Memory
2GB DDR2 @ 800Mhz
Processor
Pentium Dual Core E2180 @ 2GHz
Hard Drive
500GB
Video Card
Nvidia 9600GT 512MB (sound on HDMI via SPDIF, if needed)
Infrared Receiver
HP USB IR Receiver (RC6 / eHome compatible, purchased on eBay)
Remote
Logitech Harmony 700
HTPC Setup Guide

Make it Work

I’ve tried three separate XBMC setups on this computer. XBMC on Windows 7, XBMCbuntu and OpenELEC. Long story short, Windows 7 and XBMCbuntu did not perform well. I ran into almost constant issues with freezing and poor performance – started to think the old components were to blame. After hours of frustration, I stumbled on OpenELEC.

OpenELEC is a standalone Linux distribution for XBMC. The installation is tiny, and it runs on my old computer perfectly. I chose the Generic image of OpenELEC for this computer, as it is Intel based with an Nvidia video card. To my surprise, everything worked out of the box. There was no performance issues at all.

I did have some issues installing OpenELEC. The motherboard was unable to read the Live USB. PLOP Boot Manager on a CD-ROM was required to force USB 1.1 and the flash memory had to be smaller than 2GB for it to successfully boot.

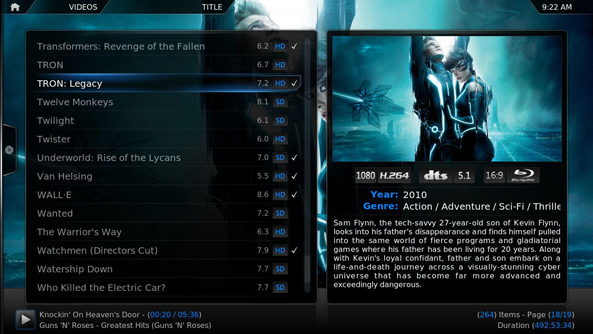
XBMC Screenshot

The Harmony remote worked out of the box using the Windows Media Center preset provided. I have made some small customisations that I wont go into here. If you don’t have a remote or IR receiver, XBMC has an Andriod and iOS App that works over Wi-Fi. The computer goes into an S3 sleep state, and runs only the bare essentials to reduce noise and power consumption. The possibilities are endless. I would like to move the computer into a slimline HTPC case one day.

For more information about how to configure OpenELEC see the Wiki. One note to avoid confusion, you will need to SSH (I used Putty) to access restricted terminal functionality over your home network. If you want to get under the hood.