In my previous post, I briefly explained the process that I went through to use XBMC (now Kodi) on an old computer.
My old computer didn’t actually die, but I struggled with it for well over a year. It would fail, I’d jiggle the components and it would live on. The Logitech Z5500 control pod is what failed after 7 years of enjoyment. Ideally you want an A/V Receiver that supports HDMI pass-through. I replaced the old home theatre with an affordable Yamaha package, sporting an RX-V375 Receiver, NS-PB120 Speakers, and a YST-SW216 10″ Subwoofer.
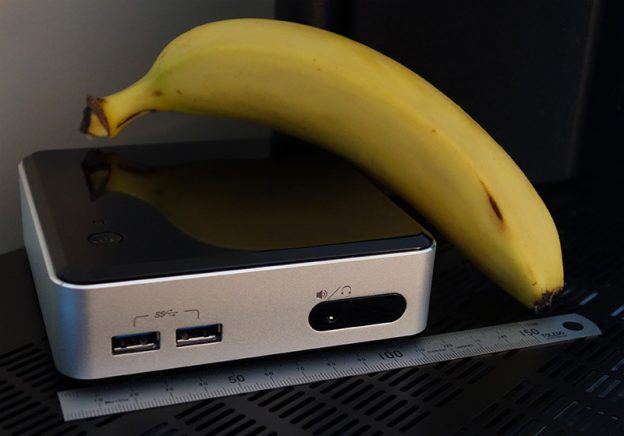
The NUC that I chose is the D54250WYK. The most powerful model at the time with an i5 processor. Opening the box you are welcomed with the famous Intel tune, which is a cute gimmick. I’ve dropped in 8GB of Kingston RAM, Intel Wireless AC card and an Intel 30GB mSATA SSD. The last items required are a Cloverleaf (C5) power cable and a Mini-HDMI to HDMI 1.4a cable. These Intel NUC’s are smaller than you think, its an incredible device. It even has an on-board IR sensor.
Make it Work
Of course, the Operating System I’ll be using is OpenELEC. You can download the latest release here. I’ll run you through my forum findings as best I can.
With the BIOS version available at the time of this post. The device would restart instantly when it tried to suspend. I managed to get it working by disabling all settings in the Power options. I then set ‘Wake on LAN from S4/S5’ to ‘Power On – Normal Boot’, and enabled the ‘Deep S4/S5’ setting. With this configuration I am able to send the device into a low power state. I am then able to wake it using the IR sensor and my Harmony 700 Remote. Intel actually responded right after I posted in the long running thread about the issue. There is a beta BIOS that appears to address the bug. I will update when it goes stable.
Once you have installed OpenELEC, you might notice that your remote does not work. The IR driver is not enabled by default. You’ll want to edit the autostart.sh file from another computer on your network using SSH. What is SSH?
After figuring out SSH, enter the following command to edit the file.
nano /storage/.config/autostart.sh
Then add the following lines to the file to enable the driver.
#!/bin/sh

modprobe -r nuvoton-cir
echo "auto" > "/sys/bus/acpi/devices/NTN0530:00/physical_node/resources"
modprobe nuvoton-cir
If you find that your colours are washed out and you have an RGB ‘Full Range’ display like mine, add this line while you are there.
xrandr --output HDMI1 --set "Broadcast RGB" "Full"
Ctrl+X to Save and Exit. Then run this final command for good measure.
chmod 755 /storage/.config/autostart.sh
Now reboot your NUC and check to see if the changes have worked. I am assuming you already have a Windows Media Center SE profile installed on your Harmony Remote, or equivalent device. The remote should now control Kodi, and colours should be deeper.
That’s about all you need to do right now to get the Intel NUC running with Kodi. The rest comes down to personal preference. I might write some posts about more customisations I like to make in the near future.

